
-
Cuchillos de estilo japonés
-
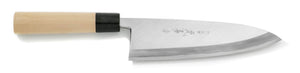 Cuchillos Deba
-
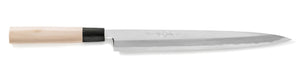 Cuchillos sashimi Yanagiba
-
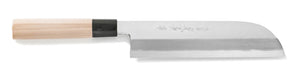 Cuchillos Usuba
-
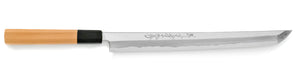 Cuchillos Sakimaru Takobiki
-
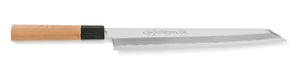 Cuchillos Kiritsuke Yanagiba
-
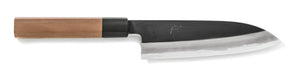 Cuchillos Wa-Santoku
-
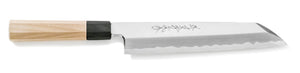 Cuchillos Kiritsuke
-
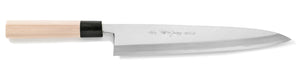 Cuchillos Mioroshi
-
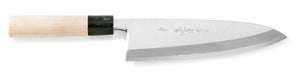 Cuchillos Aideba
-
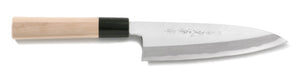 Cuchillos Funayuki
-
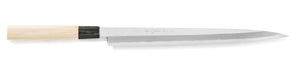 Cuchillos Fugubiki
-
 Cuchillos Sashimi Takobiki
-
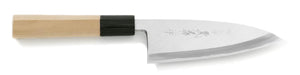 Cuchillos Aji-Kiri
-
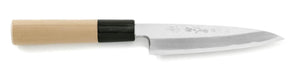 Cuchillos Baran-Kiri
-
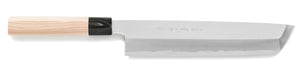 Cuchillos Hamo Honekiri
-
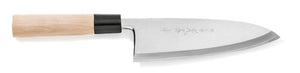 Cuchillos Fugu Deba
-
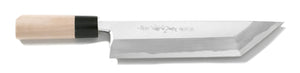 Cuchillos Unagi Saki
-
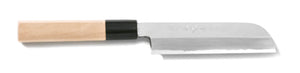 Cuchillos Mukimono
-
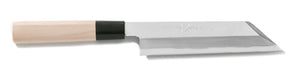 Cuchillos Kenmuki
-
 Cuchillos Sobakiri
-
- Cuchillos de estilo occidental
- Cuchillos Damasco
- Cuchillos de cocina doméstico
- Accesorios
- Regalos
- Todos los productos

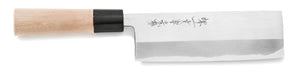

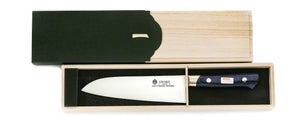
Sharpening Hamokiri Knives
The hamokiri (also called honekiri) kitchen knife is one of the most difficult kitchen knives to sharpen, even for professionals. Used for cutting through the fine bones found in hamo (conger pike eel), this kitchen knife is a quintessential part of Osaka and Japanese cuisine though, even if it is a much rarer knife.
This article will teach you the fundamentals and processes behind sharpening a hamokiri knife. While there are many ways to sharpen, the methods below are our methods.
What is a Hamokiri Kitchen Knife?
The hamokiri is a single-bevel traditional Japanese kitchen knife that is longer, thicker, and heavier than its counterparts.
This knife is required for the hamokiri cutting technique, which involves slicing through a hamo's fine bones (you can sometimes hear a crunching sound when you use this knife) without damaging the skin below. If you see a chef using a hamokiri, you can assume that they are incredibly experienced.
Additionally, the knife is also much taller than other single-bevel knives, which makes the knife more difficult to properly sharpen.
The closest single-bevel knife you'll find to the hamokiri is the usuba, but there are still two big differences.
Firstly, the hamokiri's edge has a slight curve.
Second, the bevel is not completely flat, and has a slight angle to it.
Because of this, as you sharpen a hamokiri, you need to change the angle more than you would with an usuba.
Step 1: Adding a Micro-Bevel
Before sharpening, please make sure your sharpening stones are completely flattened to prevent any accidental damage to your knife.
Pre-sharpening here involves adding a micro-bevel or koba to the hamokiri before starting the main sharpening. A #1000 grit stone works well for this, because it allows you to clearly see where your cutting edge is.
Once the micro-bevel shows along the whole edge, move onto sharpening the main bevel. Start with a very light pass laying the bevel flat on the stone. This allows you to see which parts of the knife are making contact with the stone and which aren't.
Step 2: Removing Hard Steel and Working the Hamokiri's Bevel
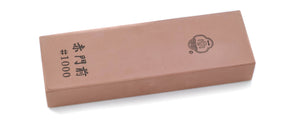
On knives like hamokiri which have wider bevels, it's best to not try hitting the entire bevel at once. Instead, focus on grinding down and removing the knife's hard steel or hagane. We recommend using either magnesia stones, or virtified stones like our #1000 Akamonzen.
If you try to sharpen flat on a coarse or stone or even medium stones that lean on the coarser side of abrasive material, the following can happen.
- The soft iron cladding or jigane will wear away first and cause the knife to dip inwards
- The hard steel doesn't lose nearly as much, and winds up rounding off
- The shinogi line can widen
This advice also extends to thinning the bevel, don't lay the hamokiri fully flat. Focus on the hard steel portion of thef the knife and thin out roughly the lower half of the bevel.
A difficult part of hamokiri sharpening, especially at this step, is the knife's tip. If you raise your elbow and aim to press the tip with a little more pressure, it will make contact with the whetstone more easily. Experiment with shifting the angle slightly as well to hit exactly what you want.
If you tilt the knife too far towards the shinogi line, it will widen, so keep the edge from lifting off the stone.
In short, don't sharpen the entire bevel at once. Grind the hard steel down first, then adjust the soft iron's thickness to compensate. This prevents the blade from getting too thick, retaining the precise cutting power that the hamokiri needs.
Step 3: Creating An Essential Micro-Bevel
A hamokiri without a micro-bevel will chip quickly, so we believe it is mandatory to finish with one. You'll do this with finishing stones of #2000 or finer.
The challenge with a micro-bevel is balancing strength and cutting ability (kireaji).
A thicker micro-bevel will resist chipping, but it also won't glide through hamo as well. If the hamokiri stops cutting under the force of its own weight alone, you need to start pushing into it, and that can mean you'll cut into the skin and get the hamokiri cutting technique wrong.
In turn, a thinner micro-bevel glides through the hamo easily, but causes the edge to chip bit by bit, requiring more maintenance.
There's no real right decision as to which to go for here, so go with your own personal preference. Our team creates a micro-bevel slightly on the thicker side, similar to what you would find on a deba knife.
Whetstone grit number is also a difficult decision. Some people will stop at a slightly coarser finishing stone at #2000–#3000, and some will go as high as #12000 like you would with a yanagiba knife.
Our team hasn't decided which is better per se, but what we do is use around two or three passes on the stone with a standard finishing stone at around #5000–#6000, unless our customers recommend otherwise. So if this is your first time, use that as a good starting point.
A few light passes should be done on the back or ura of the knife as well, but be especially careful not to change the knife's shape.
Keep in mind at this point the main bevel is still only at #1000, so it is a little on the rough side byt still fairly even. It is up to you whether you want to take the main bevel to a higher grit or not. A higher grit makes rust less noticable and leaves fewer scratches to get in the way, but naturally requires a lot more work. Our team tend to take the main bevel up to #3000–#4000.
We do have an alternative sharpening method as well if you are concerned about chipping the knife.
In Step 2, we recommend thinning the hard steel then adjusting the soft iron to match. However, another option is to thin the hard still directly while gradually rounding it into a clamshell edge (hamaguri-ha or convex edge.)
This style of sharpening can make the edge somewhat more resistant to chipping, so it's worth trying if that's your biggest concern.
Watch Our YouTube Video
If you want to watch a video version of the above article, which gives you a lot more visual examples, you can find it on Sakai Ichimonji Mitsuhide's Global YouTube channel, or by watching the embedded video just below!
Please leave a comment if you found the video from this page. We always love hearing feedback about our videos from those who watch them.
Recommended Hamokiri Kitchen Knives
Sakai Ichimonji Mitsuhide has one of the larger ranges of hamokiri kitchen knives you'll find in Japan and the world. Take a look at our range below!
Sakai Ichimonji Mitsuhide White Steel #1 Montanren Hamokiri
Our White Steel #1 Montanren Hamokiri knife is a knife that boasts excellent cutting performance, edge retention, while staying easy to sharpen.
The handle is made of water-buffalo capped Japanese yew wood (ichi-i), which has high concentrations of natural oil. It's often used in high-end furniture due to its long lifespan. Yew wood naturally darkens overtime, making each handle and piece truly unique.
Sakai Ichimonji Mitsuhide White Steel #2 Kasumi Hamokiri
Our White Steel #2 Kasumi Hamokiri is focused on cost performance, and rates highly amongst beginners and veterans alike!
As like the rest of our Kasumi line, this is all about offering the best performance we can at the best price we can, while staying in the realm of Sakai knifemaking.
The handle is made using Japanese magnolia wood, keeping the knife in line with being inexpensive while offering high performance.
Sakai Ichimonji Mitsuhide Blue Steel #1 Montanren Hamokiri
Our Blue Steel #1 Montanren Hamokiri is all about hardness and edge potential. This will be harder to sharpen, but if looked after will last a long time.
Blue Steel #1 is less common amongst hamokiri due to chip resistance, however some chefs really value the extreme edge retention Blue Steel #1 can provide, using a different micro-bevel thickness to change the balance between cutting ability and edge retention.
Like the White Steel #1 Montanren, this handle is made using Japanese yew wood.
This model comes with the magnolia wood saya included!
Sakai Ichimonji Mitsuhide Blue Steel #2 Hongasumi Hamokiri
Our Blue Steel #2 Hongasumi Hamokiri adds some rust resistance to the hamokiri, removing the need to go to extremely high finishing stones as rust won't appear as often if looked after.
Many newcomers to Japanese cuisine like Blue Steel #2 due to it still being cost-friendly yet offering a bit more durability.
Like the White Steel #2 Kasumi, this handle is made using Japanese magnolia wood.
Frequently Asked Questions
Find answers to our most common hamokiri sharpening questions below!
What is a Hamokiri?
A hamokiri is a single-bevel kitchen knife traditionally made in Japan used for processing conger pike eel, known as hamo in Japanese.
How important is a micro-bevel on a Hamokiri?
A good micro-bevel is mandatory for hamokiri sharpening, otherwise the hamokiri knife will chip as it is used.
What types of whetstones should you use when sharpening a Hamokiri?
We recommend using magnesia or vitrified whetstones for sharpening hamokiri knives.
What grit should you take the Hamokiri's bevel and micro-bevel to?
This depends on the person, but we take our bevel to #3000–#4000, and our micro-bevel to #5000–#6000, so use this as a starting point if you do not know where to begin. Keep in mind you will need medium stones as well to create the initial micro-bevel.
How think should you make the Hamokiri's micro-bevel?
This depends on the person and what you value in cutting.
A thinner micro-bevel will allow for more precise cutting, but causes the knife to chip more easily.
A thicker micro-bevel grants better chip resistance, but if it's too thick the hamokiri won't cut through hamo properly anymore, and as hamokiri cutting is difficult as is, this is something to bear in mind.
We create a micro-bevel slightly on the thicker side akin to a deba, in order to increase chipping resistance without interrupting cutting ability too much.