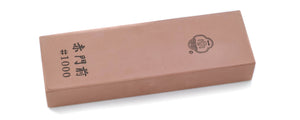
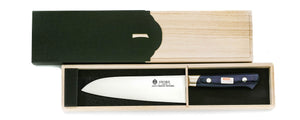
How to Sharpen a Japanese Yanagiba Knife
A Yanagiba is used for slicing sashimi with a pulling action. The cut must be performed in one fluid slice or the sashimi will have jagged areas, leading to an unpleasant appearance.
The strength of the Yanagiba is in the blade's length and superior sharpness. To do this, you need to sharpen the main edge at a slight angle.
1. Sharpen the rounded edge of the blade.
When the edge has become rounded, the blade can no longer be considered sharp.
In order to correct this, sharpen the blade with a medium abrasive stone/whetstone at a 45 degree angle until the edge of the blade has burred.
At this stage, fixing any chips or dents on the blade is advised.
When the blade is sharpened upright, a two-stepped edge is formed at the tip of the blade.
This two-stepped foundation will be used as a base for the rest of the sharpening process.
2. Erase the two-stepped blade.
Sharpen the two-stepped blade that was just made using a rough abrasive stone/whestone until it dissapears.
If the entire cutting edge is not sharpened evenly, the blade will lose its shape.
It's important to note that Japanese kitchen knives (except Honyaki) are a combination of steel and soft iron.
Approximately two-thirds of the cutting edge is made up of soft iron. If you try to sharpen the cutting edge uniformly, only the soft iron part will be sharpened and your shinogi line will be broken, disrupting your knife shape.
Press the blade against the whetstone with the fingers of your left hand, and apply force to the cutting edge with your right hand. Do this with similar force from both hands to sharpen the entire cutting edge.
3. Polish the blade with a medium grindstone.
The sharpening from the coarse whetstone earlier will leave your knife with a very rough cutting edge.
Use a medium abrasive stone/whetstone to polish it until the scratches disappear.
Since the blade is thinner due to the previous sharpening, be careful not to overdo this step so that you don't remove too much of your blade. It can be very easy to accidentally go too far here.
From this point on, the blade sharpening will be significantly more obvious.
As with the coarse whetstone grind, set up the blade with a medium abrasive stone and lightly pull out the small edge like the two-stepped procedure earlier.
Then, sharpen with the same type of whetstone until this small edge disappears.
Slightly different to the sharpening of Deba knives, a Yanagiba knife demands absolute sharpness.
When sharpening with a medium whetstone don't focus too much on the clam-shaped edge, but instead focus on sharpening the entire blade.
When sharpening a Yanagiba knife, it's important not to lose the shape of the cutting edge.
Yanagiba knives have a long, thin blade. As a result, the tip of this blade can often warp, taking a Concorde aircraft-like shape.
This is generally because the whetstone has not been correctly applied all the way to the tip.
Please sharpen with care and awareness so that the whetstone makes it to the cutting edge.
4. Use a finishing stone
In order to improve the blade's sharpness, it's important to sharpen at the end with a finishing stone.
Firstly, polish the scratches made by the medium whetstone on the entire cutting edge with the finishing stone.
Do not sharpen until burrs appear, focus simply on scratch removal.
Lightly sharpen the blade with the finishing stone in the same way as during the medium sharpening.
Continue sharpening until this small edge disappears.
At this stage, sharpen the edge of the Yanagiba knife with the clam-shaped finish in mind.
5. Press the back side
The back side of the knife is also sharpened to get rid of the burrs that appear when the cutting edge is sharpened.
The back of a Japanese kitchen knife is concave (Urasuki), so it is easy to hit the cutting edge if you aren't careful.
You only need a finishing stone for this step.
Please switch hands for sharpening and place the entire back side against the grinding stone.
Be sure to place the entire back side of the blade on the grinding wheel, and do not raise the blade to create an angle. Keep it flattened.
Be sure to use your whetstone horizontally when doing this sharpening.
6. A finer edge
At this point, the cutting edge is already sharpened.
However, the blade edge is too thin and is very prone to chipping.
To make the blade thicker, set the blade at a 45-degree angle and draw a smaller edge (thread edge).
Again, use a finishing stone for this step.
If you use a medium abrasive stone, the smaller edge will become too thick and the sharpness will deteriorate, ruining your hard work.
Set the blade upright at about 45 degrees and lightly sharpen the entire edge of the blade until it starts to burr.
After that, press the back side of the blade in the same way as in step 5.
Finally, enjoy your sharpened knife!


