-
Japanese Knives
-
 Deba Knives
 -
 Yanagiba Sashimi Knives
 -
 Usuba Knives
 -
 Sakimaru Takobiki Knives
 -
 Kiritsuke Yanagiba Knives
 -
 Wa-Santoku Knives
 -
 Kiritsuke Knives
 -
 Mioroshi Knives
 -
 Aideba Knives
 -
 Funayuki Knives
 -
 Fugubiki Knives
 -
 Takobiki Sashimi Knives
 -
 Aji-Kiri Knives
 -
 Baran-Kiri Knives
 -
 Hamo Honekiri Knives
 -
 Fugu Deba Knives
 -
 Unagi Saki Knives
 -
 Mukimono Knives
 -
 Kenmuki Knives
 -
 Sobakiri Knives
-
- Western Knives
- Damascus Knives
- Home Kitchen Knives
- Accessories
- Gifts
- All Products


Whetstone Care
Knife maintenance doesn't just stop at the knife, but the tools you sharpen it with need care as well. Naturally, this includes the main tool people sharpening Japanese knives normally use - whetstones.
It makes sense to keep the surface clean and maintain your whetstone often of course, but there's more to it. Follow along for tips to keep your whetstone in good shape, and stop it from falling into disrepair as well as the benefits of resurfacing or "leveling" your whetstone.
Is whetstone care really necessary?
While you don't have to be as particular with whetstone care as knife care, it's still important to keep your whetstones in prime condition.
If a whetstone hasn't been properly cared for or stored, it could wind up with cracks on it or worse, which severely impacts its lifespan. A crack generally can't be fixed, let alone if a whetstone splits in two.
Here's some tips to make sure you don't accidentally damage your whetstone, or amplify any damage currently on it.
Be very careful not to crack the whetstone
The most important part about whetstones and their maintenance is to make sure that they don't break. This can happen unexpectedly - you might open your storage case only to find one of your whetstones has cracks or has even split in two! Whetstones are very susceptible to changes in temperature and humidity; natural whetstones even more so, being regarded as highly delicate tools. This kind of damage is somewhat preventable though, using the care tips below:
- When you have finished using your whetstones, wipe off any moisture and let them fully dry
Cracks can occur due to temperature changes when stored with moisture still on or in the stone. Dry them thoroughly before putting away.
- Store your whetstones out of direct sunlight
Direct sunlight can cause your whetstones to crack, so store them indoors in a darker place. A storage case for your whetstones can work well here.
- Store your whetstones in a place where temperature and humidity is more constant
As written above, whetstones are sensitive to changes in temperature and humidity. Keep them away from items like humidity changers and temperature controllers.
- If you have multiple whetstones, don't stack them
Whetstones will crack or break from too much weight being placed on them. If you store multiple on top of each other, the lower ones have a high chance of cracking.
Be careful not to soak your whetstone too much in water
It's easy to think that before you sharpen a knife on a whetstone, that you need to soak the whetstone first.
This is indeed the case with whetstones made by "vitrified method", as they're quenched and molded at over 1000 degrees Celsius during their manufacturing. This strongly bonds the abrasive grains in the stone, meaning they'll suffer only very slight deterioration from exposure to water. To get the water to properly penetrate the stone however and make it usable, it needs to be soaked - normally for about 5-10 minutes, but this may vary.
However, there are other kinds of whetstones that should not be soaked. These are whetstones made by "resinoid method" or "magnesia method", which are both hardened by baking at lower temperatures or simply letting them dry naturally. This leaves a lot of binding agent inside these kinds of stones. If these stones are soaked in water, this agent weakens, which is what is holding the abrasive grains together. This can cause the stone to crack or even break apart if soaked for too long.
A quick way to tell what kind of whetstone you have is to submerge it under some water. If you see lots of bubbles coming from the whetstone, it's a vitrified one and is meant to be soaked. If you don't, it's one of the other two types and should not be soaked. For those whetstones, just a splash of water on top is enough.
Don't let the whetstone get clogged
You might find your whetstone has become slippery over time, due to grinding debris getting stuck in the abrasive grains on the whetstone. This is called clogging, and tends to happen with magnesia method whetstones. We have a full article on clogged whetstones you can read, but in short rubbing two whetstones of the same grit number together will fix this, or by using a dressing stone made specifically for the purpose of fixing clogging. Most of our finishing stones come with this dressing stone included.
Resurfacing your whetstones
When you sharpen your knife, it's not only the knife that is being worn away in this process, but the stone too.
If you use your entire whetstone to sharpen a knife, this may not be much of an issue. It's quite normal though to only use a section of it, normally the center. This leaves a larger and larger dent over time in the center of your whetstone. This is a huge problem, as if you sharpen your blade with a stone like this your blade will likely lose it's proper or intended shape.
As a result, it's more crucial than almost anything else in sharpening to make sure your whetstone has a flat face or level surface on it. We call this resurfacing, or sometimes levelling.
Why is a flat face necessary?
The first thing to keep in mind and check for when it comes to sharpening your knife is to make sure you are sharpening it with a flat whetstone. We consider this absolutely necessary. This is predominantly because the cutting edge must be sharpened evenly, and this is easiest and best done on a flat surface.
If you were to sharpen on a concave surface, in effect the blade will also become concave as the picture below demonstrates.
Ideally, you want to sharpen a knife to what we refer to as a "clam shell edge," but this is really only possible on a flat surface. If you sharpen using an uneven whetstone, you may not be hitting the sharpening points on the blade you need to hit, and as a result your blade again can lose its shape. In particular, a single-edged Japanese knife must be kept flat on the back side, so the whetstone it's being sharpened on must also be kept flat.
Above anything else, sharpening is significantly more difficult on a concave whetstone. So by flattening the surface, it makes it easier in the long run for you to properly maintain your knives.
Frequency of resurfacing
This is a pretty open concept, as it depends on how often you're sharpening your knives. We recommend to flatten it as often as possible, though.
This is mostly because the smaller the dent in the whetstone is, the easier it is to fix. This is similar to sharpening knives, if you have a huge chip in the knife it takes longer to fix and ruins the lifespan of the knife. Consider the dent in a whetstone similar to a chip in a knife.
If you have time, it's okay to just really lightly resurface the whetstone after using it. In store if we notice a small dent even while we're sharpening, we'll fix that before continuing to make sure we're getting the best result possible.
How to resurface
There's many different ways to resurface a whetstone and we'll showcase some examples here, but one core rule always applies: always resurface with a flat object.
Since we're returning a concave surface to a flat one, you have to do this with a surface that is flat in itself, otherwise you'll likely just amplify the problem. Here's a few items you can use for resurfacing:
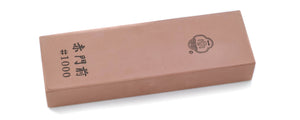
- A resurfacing whetstone
These are whetstones that are specfically designed for fixing your whetstone. Sometimes these are called levelling whetstones, as they are meant to make your whetstone have a level (flat) surface.
- A diamond whetstone
Diamond whetstones are very commonly used for resurfacing natural whetstones and finishing whetstones. This is because diamond whetstones are always flat, so you can be much more precise with your leveling and not have to worry about wastage.
- A concrete block
Some people feel it's a waste to use a resurfacing whetstone to fix up another whetstone, so they'll rub their whetstone against something like a concrete block. While this does work, it's a temporary measure and not recommended.
Recommended resurfacing whetstones
We at Sakai Ichimonji Mitsuhide make our own resurfacing whetstones you can use. Here's some of them below. Click them to go to their respective pages. We sell other solutions as well, so contact us if you're unsure.
How to Resurface
's There's really no special way to do it, ultimately you're just rubbing the two surfaces against each other to make them both flat.
What's important though is making sure you apply even force the entire way throughout, or the stone won't get leveled. For this, we have a quick guide you can follow.
Step 1) Draw a line on the surface of the whetstone with an oil-based pen
Start with drawing diagonal lines all over the surface of the whetstone you plan to level, using something akin to a permanent marker.
By doing this, you'll see where the dents are as you resurface.
Step 2) Put the resurfacing stone on the whetstone you want to fix and move it back and forth in a straight manner
Put the front surface of the resurfacing stone on the whetstone you want to fix. Then, press on the top part (further away from you) with your left hand, and the bottom part (closer to you) with your right hand.
Move the resurfacing stone straight back and forth, applying even pressure from both hands as much as possible.
*If your resurfacing stone is bigger than your whestone, you can lay the resurfacing stone underneath and put the whetstone on it. You'll need to grip the whetstone and move it back and forth on the resurfacing stone.
Step 3) Change the grip between the top and bottom parts of the resurfacing stone
Even if you apply even force, the movements between the two stones aren't going to be absolutely identical - you'll encounter some variance but you want to keep the stone flat.
The best way to counter this is to turn the whetstone (change the bottom part that's near you to be the top part that's far away from you) and repeat the previous step.
Step 4) Move the resurfacing stone diagonally
Place the resurfacing stone diagonally at an angle that two corners of resurfacing stone are on the center line of the whetstone.
Then, again, repeat the previous steps with the moving motion, back and forth. Then, switch the top and bottom of the resurfacing stone again and move it back and forth.
Afterwards, hold the whetstones in the opposite diagonal direction and again repeat.
Step 5) Check the lines on the whetstone's surface
Finally, check to make sure all the lines are completely erased.
If you see any lines remaining, it means there are still dents in your whetstone. Go back to the first step and start over to fix this.
As a note, remember that your resurfacing whetstone will also wear down over use, so be sure to use all surfaces of it evenly.
The steps above also assume you are using a large, stationary type of resurfacing whetstone. If you're using a smaller one, or a diamond whetstone, leave the whetstone in place instead. Hold the resurfacing whetstone and resurface applying the same principles above.
We can also help you repair your whetstones - contact us if you need help!