-
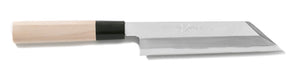
Japanese Knives
-
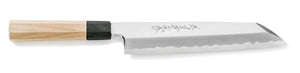
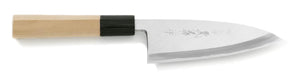
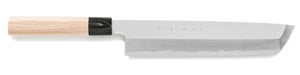
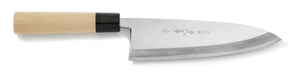 Deba Knives
 -
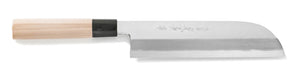
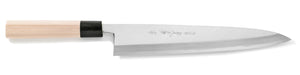
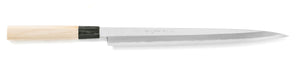
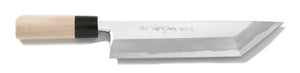
 Yanagiba Sashimi Knives
 -
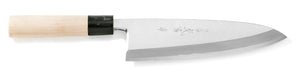
 Usuba Knives
 -
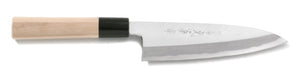
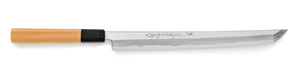
 Sakimaru Takobiki Knives
 -
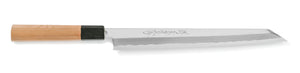 Kiritsuke Yanagiba Knives
 -
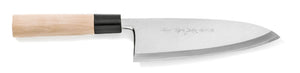
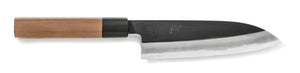 Wa-Santoku Knives
 -
 Kiritsuke Knives
 -
 Mioroshi Knives
 -
 Aideba Knives
 -
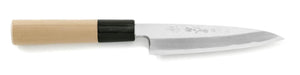
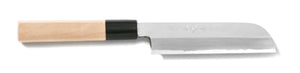
 Funayuki Knives
 -
 Fugubiki Knives
 -
 Takobiki Sashimi Knives
 -
 Aji-Kiri Knives
 -
 Baran-Kiri Knives
 -
 Hamo Honekiri Knives
 -
 Fugu Deba Knives
 -
 Unagi Saki Knives
 -
 Mukimono Knives
 -
 Kenmuki Knives
 -
 Sobakiri Knives
-
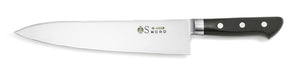
- Western Knives
- Damascus Knives
- Home Kitchen Knives
- Accessories
- Gifts
- All Products


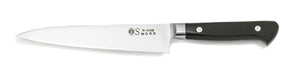
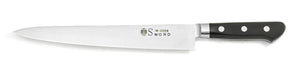
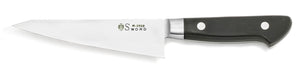


Sharpening Petty and Paring Knives
While a petty knife is a double-edged knife, that doesn't mean it's sharpened symmetrically.
In order to sharpen a petty knife to a somewhat single-edged state, the right side is rounded with a much tighter angle and the left side is rounded to be nearly flat.
Some may call this a 70/30 ratio - done by sharpening the right side to a sharper 70 percent ratio, and the left side to a flatter 30 percent ratio.
These styles of knife are also sharpened to a much more precise edge as well. This article will explore why, and how to sharpen your petty knives back to a premium condition. We will go through some important pre-sharpening points, some fundamentals and the sharpening process itself.
This is a sharpening guide aimed at beginners. As a result, we go into deep detail with each step.
If you're already an experienced sharpener (for example, from another craft or trade like carpentry) you don't necessarily have to follow these steps in an exact process. You also may omit some steps (like making the secondary edges) at your own discretion. If you're new to sharpening though, follow the guide fully and read everything before starting.
Remember, sharpening is fun and not an exact science! While there are foundational methods, it's also a great chance to make a knife that uniquely is best for you. Have fun exploring the endless possibilities of sharpening!
Important points when sharpening petty and paring knives
Adjusting the thickness of the blade
Western-style knives such as petty knives don't have a fixed cutting edge like Japanese knives, so you need to decide the sharpening angle and adjust the thickness of the blade yourself. It's okay to experiment with this as you get better and better with sharpening. Find an angle and a thickness that you really like, and go with it.
Sharpen the front and back sides (right and left sides) of the blade
Since it's a double-edged blade we're working on, it's necessary to sharpen the front and back sides properly as a joint effort. However, once you get used to sharpening this knife, we recommend that you sharpen the thickness of the front and back sides separately. This allows you to have a higher degree of flexibility when sharpening as you can play with your sharpening ratios.
Be mindful of the "clamshell blade"
Unlike other Japanese knives, objects these knives cut (like food) stick more easily to the blade than single-edged knives, so you need to be conscious of the clam shell blade and sharpen the edge in a way that encourages good separation of knife and food. We'll go into an explanation of clamshell blades later.
On that note, let's start!
It's important to sharpen the petty knife thoroughly and also get the cutting edge to a clamshell shape blade form. This guide shows you how!
Step 1. Check the knife's condition
Make sure whenever you start sharpening to visually inspect your knife first.
This is because knife sharpening isn't just about the sharpening itself, but also making sure your knife keeps the correct shape.
If you sharpen without being aware of this, there's a chance the knife will unintentionally lose its form. This greatly reduces the lifespan of a knife, as you have to shape it back into its intended state. This means you have to grind away large amounts of steel you didn't have to.
Make it a habit to constantly check, and check, and check your knives. Check the blade for distortions, then the thickness of the left and right sides of your knife.
Step 2. Sharpen the rounded edge
Create a secondary edge
Simply put, if your knife edge has curled it's not going to cut anymore. There's no serrations to grip into the food, and it will slide off things when you try to cut with it. We need to return a gripping state to the knife, and this is done in multiple steps. This process assumes you have a rough, medium and finishing whetstone, or at least at minimum a rough and medium stone. Read our guide on whetstones if you don't know which ones to get!
Firstly, we're aiming to make a secondary edge in order to have a foundation to build off. Do this by raising the knife to 45 degrees on the whetstone and sharpening strictly the edge until you see a burr appearing.
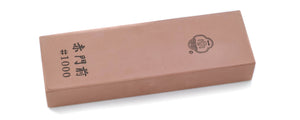
For this step, it's best to use a medium whetstone - a #1000 stone is a great way to go here.
If the knife has a chipped edge or has lost its shape, it needs to be fixed at this stage early in the sharpening process.
Make sure you do this sharpening until the original knife form is restored, then make your secondary edge.
A secondary edge now exists on the knife's cutting edge
If you do the upright sharpening correctly, you'll see a secondary edge form on your knife blade.
You can easily tell if this secondary edge exists by looking for a white line on the cutting edge, which is reflecting light off the edge itself. Move your knife edge around a light source to make it easier to see. You see this secondary edge because the knife edge effectively now has two steps to it, thus creating this light reflection.
This secondary edge is going to be the basis of your entire sharpening, and you'll continue to sharpen based on this point.
Having this secondary edge is not only important for the sharpening process, but makes it a lot easier for you to see what you're doing. You can see where you're going to sharpen, and the current state of your sharpening. We recommend creating this secondary edge to prevent your knife becoming too thin as you keep sharpening.
Step 3. Sharpen using a rough whetstone
Sharpen until the secondary edge disappears
In the knife's current state, as it's double-edged it means that the cutting point will be quite thick. Even if you were to create a sharp point now, it's not going to cut well due to the lack of thinness.
To solve this problem, lay your blade relatively flat on the whetstone and sharpen until the secondary edge disappears.
If you don't do this thoroughly, your blade will remain thick - and have reduced cutting power.
Patience is key here. Sharpen your blade patiently until it becomes thin.
The sharpening angle is extremely important
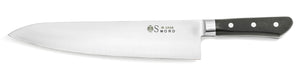
A crucial factor for sharpening Western-styled knives like gyuto, santoku and petty knives is the angle at which you sharpen it.
If you widen the sharpening width like the picture above, the end result will be a thin blade that is very sharp. However, you'll find it's more likely to chip as it's effectively more brittle. Conversely, if you narrow the sharpening width by using a higher angle, the end result is going to be less sharp but also less likely to chip or break.
For beginners who perhaps haven't found the angle they like yet, we recommend a 10 to 15 degree angle for sharpening - about the size of two standard coins stacked on top of eachother. We use two 500 Yen coins in store for this example. Doing this gives you a sharpening width of about 3 millimeters, which is a great place to base your preferences from. As you use the knife more and get more used to cutting with it and sharpening it, experiment with the thickness from there and go for a knife that is sharper or more chip-resistant. Sharpening is a way to make a knife that is perfect for you, so embrace the flexibility it provides!
At this stage of sharpening via rough whetstone, it's necessary to properly prepare the cutting edge of the knife for the remaining sharpening steps.
If the blade is uneven after this point, the medium whetstone sharpening at the next step will not be able to bring about your ideal sharpening result - so be patient and make sure your sharpening is properly formed across the entire edge.
Sharpening Tip #1
The trick to getting the entire cutting edge to hit the whetstone cleanly is to lightly press the area of the blade you're sharpening against the whetstone with your left fingers, as well as twist your right wrist slightly away from the edge of the blade. If your left fingers are pressing too strongly, the edge will be oversharpened, and if you twist your right wrist too much, the whetstone will not touch the edge of the blade. This might take some practice - see our photo below! This example is on a gyuto knife, but works the same on a petty.
Check that the secondary edge has disappeared on the side you're sharpening. Following that, check to see if burrs have appeared on the opposite side. You want these burrs on the entire edge of the blade. If there is an area missing those burrs, that area needs more sharpening.
Step 4. Sharpen the opposite side with the same stone
Switch hands (for example, from your right to your left hand) and sharpen the currently unsharpened side of the knife with the same rough whetstone.
Ideally, the back side should be as flat as possible - like you would see on a single-edged knife. So, when sharpening the back of the blade to reach this state, lay the blade in a lower angle than when you sharpened the front side. Then sharpen thoroughly until burrs appear on the opposite side (the side you sharpened first). The diagram below shows an example.
If you're intending to completely single-edge the blade here, make sure the back side is completely flat against the whetstone. Also, be sure to hit the entire surface of this side when sharpening.
Step 5. Sharpen with a medium whetstone
The previous steps have all been about preparing the blade itself for a proper sharpening. From here we start making the blade actually sharp and polished.
Like you did with the rough whetstone sharpening, create a secondary edge by lightly sharpening the blade on an upright angle.
If you oversharpen here the blade will become thicker, so be sure to only use light force for this step.
Erase rough sharpening scratches
You may have noticed after the rough whetstone sharpening that the surface of the cutting edge is currently looking extremely rough, with some scratches on it. This is normal and expected behavior from sharpening with that stone. The idea behind this step is to polish and sharpen until those polishing scratches start to disappear using a medium whetstone. Again this can take some time, but do this patiently until you no longer see those scratches.
Be careful however, as the blade should now be very thin. This means it will burr very easily and creative excessive thinning. Don't sharpen all the way up to the cutting edge.
Establishing a sharp edge
Sharpen the knife at a slightly higher angle than when you did with the rough whetstone earlier. Do this until that secondary edge disappears.
Raising the blade itself slightly like this helps the blade make proper contact, which should lead to a "clamshell edge" being made like you see above. This is the edge we are looking for. Again, confirm that burrs have appeared on the opposite side from the tip to the base of the blade.
Sharpening Tip #2
The trick to successfully getting the whetstone to properly make contact with the tip of the blade is to hold the edge with your left fingers while turning your right wrist, which is gripping the handle, inward as you sharpen. By doing this, the blade will raise very slightly, making the tip hit the whetstone easier. See the image below for an example. This example is on a gyuto knife, but again works the same on a petty.
Sharpen the back side
Switch to the other side and sharpen until burrs appear on the opposite side. Be sure that you sharpen this side with the same angle as you did with the rough whetstone. This is to prevent you rounding the blade too much on this side.
Check to see if the secondary edge has disppeared
Visually check the entire blade. Look for a secondary edge - if you've done your sharpening correctly you shouldn't be able to find one! Be sure to reflect the knife off various light angles to make certain.
If you do find spots where one still exists, sharpen specifically that area with some slight pressure from your left fingers.
If you can confirm the secondary edge is no longer there, that means you've gotten your knife back to a cutting state - congratulations! We're not done yet, though.
If you're new to sharpening and just using a medium stone here for home use, or if you're not looking for the best sharpness possible you can safely skip the next step and go straight to the step after about making a final secondary edge.
If you want that extra sharpness though - read on ahead!
Step 6. Sharpen with a finishing whetstone
In the same way you sharpened with the medium whetstone, use your finishing whetstone to create a new secondary edge, but only a small one. Be sure to check and make certain the secondary edge has appeared slightly before continuing further.
Remove sharpening scratches created from the medium whetstone
From this step, we'll sharpen the knife with a finishing whetstone to make your already sharp knife even sharper!
Polish the blade on your finishing stone to remove the scratches created by the medium whetstone, much like you polished away the ones created by the rough whetstone using the medium one. Don't sharpen the cutting edge though - this will make burrs form.
Perform your final sharpening
Sharpen your blade with the finishing whetstone a final time until the secondary edge dissapears.
When performing this final sharpening, be significantly more concious of the edge of the blade compared to when you were doing this with your medium whetstone.
Sharpen the back side
Our final back side sharpening is here too! Sharpen the back side until burrs form. Make sure the angle here is the same as when you did the back side sharpening with your medium whetstone too. If you oversharpen, the back will start rounding again which we want to avoid.
We're almost done!
Step 7. Make a final secondary edge
At this point you have a very sharp blade with great cutting power - but it will be brittle. It is extremely thin, so making a final secondary edge with a tiny bit of work will give your final result more stability as you'd hate to chip all the work you've done!
Raise the blade angle and very lightly make a secondary edge
Ideally, you'll want to use a finishing whetstone here as well but if you don't have that, use the finest stone you have. Be careful not to press too heavily when making a secondary edge as you may thicken the blade, just use very light force.
Hold the blade raised at around 45 degrees and lightly sharpen the cutting edge until a burr appears. Be sure to check the cutting edge also, and once again look for that reflective white line - meaning you have your final secondary edge!
Sharpening Tip #3
If a petty knife has a thick secondary edge, sharpness will decrease. So, you should make a secondary edge by passes as few as possible - preferably one or two. This will give you a great balance of sharpness and durability.
Once you see a burr coming out, switch to the opposite side and remove it.
Then that's it - you're done! Now it's time to test your work.
Step 8. Test cut with a newspaper
Check your sharpness by testing your petty knife with some cutting! A newspaper is best for this.
If you feel your knife smoothly cut through without issue then congratulations - you've completed your sharpening!
If your knife snags or catches on the paper though, that section still needs some work. Go back and repeat the appropriate steps on the parts that are still rough and get them to the same cutting power.
Do you have further questions?
It's okay if you do! Sharpening at first is hard, and takes a bit of time and practice. We're here to help you every step of the way! Come in-store and see us for a live demonstration or reach out to us via our contact form or our social media accounts and we'll show you everything you need to sharpen with confidence. We want your knives to last for a lifetime, and to make sure of that our knives also come with a free sharpening ticket without expiry - contact us for more details!