-
Japanese Knives
-
 Deba Knives
 -
 Yanagiba Sashimi Knives
 -
 Usuba Knives
 -
 Sakimaru Takobiki Knives
 -
 Kiritsuke Yanagiba Knives
 -
 Wa-Santoku Knives
 -
 Kiritsuke Knives
 -
 Mioroshi Knives
 -
 Aideba Knives
 -
 Funayuki Knives
 -
 Fugubiki Knives
 -
 Takobiki Sashimi Knives
 -
 Aji-Kiri Knives
 -
 Baran-Kiri Knives
 -
 Hamo Honekiri Knives
 -
 Fugu Deba Knives
 -
 Unagi Saki Knives
 -
 Mukimono Knives
 -
 Kenmuki Knives
 -
 Sobakiri Knives
-
- Western Knives
- Damascus Knives
- Home Kitchen Knives
- Accessories
- Gifts
- All Products


Making a Mirror Finish
Knives with mirror finishes look beautiful, wouldn't you agree? For example, take a look at our Ichimonji Blue Steel #1 Yanagiba that has one! It's stunning.
This is a finish that you can make at home! It takes time and lots of patience, but it is absolutely possible. It's a challenge our expert sharpeners take on out of personal interest, plus we get customer requests for it too. We often see this mirror finish on premium blades, and it makes sense to want to keep those in pristine condition given their quality and value. A mirror finish improves the corrosion resistance, after all.
How is this amazing finish created on a knife, though? In short, lots of polishing over many hours with different steps, but if you want to take on this challenge, follow along as we show you step by step how our sharpeners do it.
Main Advantages of Mirror Finished Knives
- Beautiful Appearance
- Extra Rust/Corrosion Resistance
- Increased Personal Attachment to the Knife
Can I Make a Mirror Finish Myself?
For new knives, a buffing machine is used to make a mirror finish on a blade. And they look amazing!
We often get asked by customers "Can I do this at home too?" and it is possible to get near to a similar result without a buffing machine.
There's no incredibly special techniques required to make a mirror finish, but you do require one character trait - patience.
Just be patient and keep polishing slowly and carefully. The more time, care and effort you put in, the more shiny and mirror-like the finish will become.
Be persistent, keep polishing.
Let's show you how our main sharpener does it step-by-step!
Turning a Rusty Knife into a Mirror Finished Knife
Tools Used (Pictured Below)
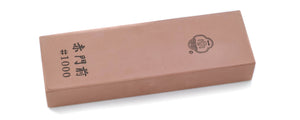
- Waterproof abrasive paper at grits #120, #240, #600, #1000, #1500
- Crystal whetstone at grits #2000, #3000
- "Mirror Craftsman" brand fluid compound
- Diamond paste at grits #10000, #12000
Keep in mind you can use different tools, but this is what our sharpeners use and what we recommend.
Step 0. Before Polishing/Pre-Preparation
If the surface you intend to polish is uneven, the mirror finish will also be uneven.
We recommend flattening this surface first with a whetstone, as you'll get a more beautiful finish at the end. Make sure to get a flat, even surface. Use a marker if you have to check the levels as you go.
Step 1. Using Abrasive Paper
The most crucial step in polishing is the first - polishing the surface with a waterproof, abrasive paper.
If you don't use water-resistant paper like this to first create a base, you might be left with deep scratches in the surface or the glossy finish at the end might wind up being uneven.
First, polish using the #120 paper.
You can polish it by hand, but results tend to be better if you wrap a small piece of wood with the paper and use that instead like the picture above. Be sure to polish only in one direction. Going back and forth is more likely to leave polishing scratches.
Once all your polishing streaks are correctly aligned and it's looking nice, move onto the next piece of paper up the grit number scale and repeat the process. Do this until all the papers have been used.
Note that you have to remove the rust cleanly at the #120 paper stage. Otherwise, you won't get a beautiful finish at the end. Our sharpener spent about half of his total time on this piece on abrasive paper polishing alone, so again this step will take time.
As you polish and go up to higher grit number abrasive papers, the knife should gradually move from looking like the left image to the right one. Note that the polishing streaks on the flat, polished surface become thinner over time. As you go they'll gradually get less and less visible, which is what we're aiming for.
The main trick here is to polish these streaks to where they are even as you increase the grit number.
Step 2. Using Crystal Whetstones
Generally, abrasive paper goes up to #2000, so after that or at that point, you'll likely need to switch to a crystal whetstone instead for finer polishing. In our case, the highest paper we used was #1500, so we moved to the crystal whetstone at #2000.
Crystal whetstones are recommended because they're less prone to clogging (filling with sharpening debris aka swarf), allowing you to continue polishing in a stable manner.
The main issue to watch out for is if any noticable scratches are still visible. After this step, it is very difficult to remove those scratches - so polish them patiently until they are no longer visible. Expect to also take considerable time on this step - our sharpener spent about a quarter of the total time required on this step. Therefore, three quarters of the entire time needed was spent on just these first two steps.
Like the papers we have multiple stones, so step up from the rougher one to the finer one as required.
By the time you're done with this step, your knife should be glossy enough to be reflecting like in the photo above.
Streaks are still noticable though, so while some people may stop here we will continue to polish further.
Step 3. Using Fluid Compound
From this point, we switch to a fluid compound to give a finer finish and polish even further. We use a compound called "Liquid Craftsman", a compound specific for knives. This compound is in a paste form, so apply the paste to a cloth then use that cloth to polish the knife, keeping mind to pick a cloth that won't cause scratches (such as microfibre). As the streaks are getting thinner, pay even closer attention to make sure those streaks are even and uniform.
At this point, the streaks have become so thin that they are only visible in specific lighting.
The glossy appearance is becoming stronger as well, making the engraving more visible than before.
However, we can continue to get rid of these streaks so let's keep going!
Step 4. Using Diamond Paste
Finally, polish your knife with diamond paste by applying it like the above picture. This will get an even clearer mirror finish. Much like our crystal whetstones, we have two pastes being used here so step up to the higher grit count paste as you go.
After this polishing procedure, wash the knife thoroughly with detergent - and of course make sure to dry it very carefully and thoroughly so you don't get rust again straight away.
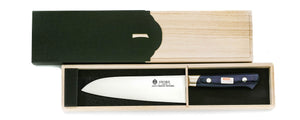
If you polish to this point, the shine will be almost akin to a mirror. As you see from the picture above, the blade reflects the Japanese characters on the box very clearly.
And that's it, you're done! Remember, this takes patience and a lot of time. Let's show a before and after as well as how long our master sharpener took - keep in mind this might take longer on your side, especially if it's your first time attempting this and you're aiming to go for the best mirror finish possible.
Before Polishing and After Polishing
Total Time Spent
- Approximately 3 hours with the abrasive papers
- Approximately 1.5 hours with crystal whetstones
- Approximately 30 minutes with the fluid compound
- Approximately 45 minutes with the diamond pastes
In total, this is just short of six hours spent polishing this yanagiba knife. A crucial thing to remember here is that knife is long and thin, so it has a fairly small surface area to turn into a mirror finish - which perhaps is one of the reasons why mirror finished yanabiga knives are more commonly seen. Knives like deba or usuba knives will take longer, and any double-edged knife will take double the time because you likely need to polish both sides.
Use the times above as a rough guideline, remembering this has been done on a thinner, rusty knife by an expert who is particular about their work.
From start to finish, this mirror finish polishing took our expert approximately 6 hours.
Mirror Finishing is Fun
As you can see making a mirror finish takes a long time, even for a professional! However, it can be easy to lose track of the hours as it's a fun experience to do, and a rewarding challenge at the end.
It's satisfying to watch a knife that started rusty wind up having an amazing reflective sheen added to it. And of course, if you're starting with a knife that isn't rusty that will take less time.
It's a great accomplishment, and perfect to make any presentation piece. Plus, it's a great way to connect to your tools.
Try the challenge out, and if you have more questions feel free to contact us. If you're having trouble sourcing the prodcuts needed we can also help. Alternatively, we also do sharpening in store and can add this mirror finish to your knife - let us know!