-
Japanese Knives
-
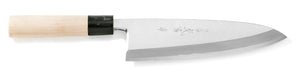
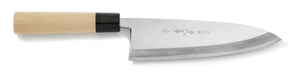 Deba Knives
 -
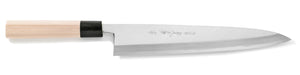
 Yanagiba Sashimi Knives
 -
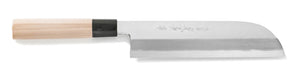 Usuba Knives
 -
 Sakimaru Takobiki Knives
 -
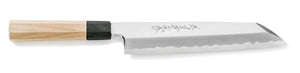
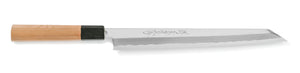 Kiritsuke Yanagiba Knives
 -
 Wa-Santoku Knives
 -
 Kiritsuke Knives
 -
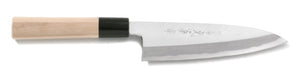
 Mioroshi Knives
 -
 Aideba Knives
 -
 Funayuki Knives
 -
 Fugubiki Knives
 -
 Takobiki Sashimi Knives
 -
 Aji-Kiri Knives
 -
 Baran-Kiri Knives
 -
 Hamo Honekiri Knives
 -
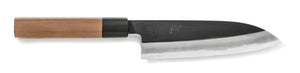
 Fugu Deba Knives
 -
 Unagi Saki Knives
 -
 Mukimono Knives
 -
 Kenmuki Knives
 -
 Sobakiri Knives
-
- Western Knives
- Damascus Knives
- Home Kitchen Knives
- Accessories
- Gifts
- All Products


Basic Knife Sharpening Theory
We believe there's a lot of people out there who want to use a good knife, and enjoy their cooking experience. The difference between a blunt knife and a properly sharpened one is as clear as night and day. Ingredients prepared with sharp tools have a better mouthfeel, taste fresher and lose less nutritional value. If the sharp knife is not cared for however, that properly sharpened knife will eventually perform the same as the blunt one.
We can't avoid this, even if we can mitigate it greatly. A knife will eventually become blunt after use. That sharpness won't magically come back either, the knife needs to be maintained by you, someone you know or professionals like us! Once it is sharpened though, it can become a treasure once again.
Sharpening is an art in itself, though. If you do it wrong, it could cause more harm to the knife than good. That's why this article exists - to help you with all the key principles you need before you commence sharpening. Consider this a guide as to how to properly prepare for sharpening. When you're actually sharpening, read along with one of our other sharpening guides in the maintenance section of our website. This article covers location, whetstone selection, sharpening angle, posture and technique. Effectively, this covers some of the theory information you'll need to know, and our sharpening guides are the practical side.
Learning how to sharpen, combined with an excellent knife and whetstones leads you to the ultimate sharpness, and a knife that can last for generations.
Where will you sharpen a knife?
Before you begin sharpening, you need to make sure you have a proper area to sharpen in. This area needs to be stable enough to hold the whetstones in place and prevent them from moving. Unstable sharpening can lead to injury, so be sure to choose your location correctly. Additionally, it makes sharpening harder.
If you sharpen at home
If you're sharpening at home, we believe that generally the kitchen is the best place to sharpen. Water is readily accessible which is needed constantly in the sharpening process as you'll need to wet the stone often. Additionally, a sink is nearby so you can easily wash away sharpening fluid (also called swarf) and the height of a kitchen workbech is designed to be easy to cook at, which is also the right height to easily do sharpening.
Once you've chosen your area, place a wet towel on it that you don't mind getting dirty, preferably two if you can spare one extra. It's probably best to make these dedicated sharpening towels, so you don't need to use fancy ones - just get some from your local discount store. You'll use this as your base for sharpening and place your whetstone on top of it. This is much safer than just using the whetstone on a surface directly as the whetstone could move around - or you could accidentally scratch the bench surface! Plus again, it will make sharpening harder without it.
If you want to make a dedicated sharpening area
If you want to be a little more particular and dedicated to your sharpening, you should consider creating a space especially for it - effectively, a sharpening table or stand.
While of course you can sharpen in the kitchen and many do, it is a process that generates a lot of dirt-like material like swarf, plus it takes up a lot of space. In a sense, having a dedicated sharpening stand is more convenient because you can sharpen anywhere you want to.
All you need is a wide metal container that can hold a fairly large amount of water, a larger, thicker container to fit that first container into, and a whetstone stand to hold the whetstone itself. You can buy these stands, or make one yourself if you have spare materials available. See the image above for an example!
The whetstone table itself should be made of either wood or plastic (it's easier to keep those materials sanitary), but if it's too thin, the table will bend and become unstable, so it is best to use one that is thick. Remember, there's going to be a lot of water in there so make sure the table can structurally hold heavier weights. In our example above, we've gone for a metal container because it can hold heavier weights, but it's easy for us to keep that sanitary too as we are in a dedicated sharpening workshop area.
Adding a non-slip pad to the back of the table will help prevent it from moving around while you sharpen too.
A big difference between using a dedicated stand and your bench is the angle you sharpen at as you want to be able to customise the table's angle somewhat. We recommend angling your table slightly with the back raised and the front lowered
If the table is tilted, the sharpening angle will be more stable, and your sharpening strokes will be smoother. It's okay to keep it flat still, but a slightly angled table will lead to a better experience - and potentially better results.
Be wary of dirt and swarf
Whenever you're sharpening, it's best to wear clothes you don't mind getting dirty or even a sharpening apron. You'll notice once you start sharpening that swarf is quite dirty and gets everywhere. Your fingers and nails are going to be very dirty afterwards as well, so be sure to properly wash them both before and after sharpening.
You'll probably want to get a nail brush to make sure you get any of the dirt that's slipped in under your nails as you work. Alternatively, simply keep your nails very short.
Choosing the best whetstones to sharpen your knife
How to choose a whetstone
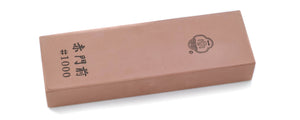
As your first whetstone for this setup, we recommend getting a medium grit artificial whetstone.
Even if you're an experienced sharpener, as Japanese knives are somewhat unique it can be tricky to know which whetstone to pick at first. Generally, whetstones are classified into three types - rough, medium, and finishing whetstones. This is determined by a stone's grit number. For example, a medium whetstone will normally have a grit number of #1000. Each type of whetstone has it's own purposes. Some of these purposes are listed below as broad examples:
| Rough Whetstone | Medium Whetstone | Finishing Whetstone |
| #80 - #400 | Around #1000 | #2000 and above |
| Used when a blade is chipped, or to fully reset your edge or change the knife shape | Used for regular/daily maintenance and to create a cutting edge | Used for making a secondary edge and "back pulling"/urasuki or for removing scratches |
We cover this in a lot more detail in our whetstone buying guide. Please read that if you want to know more about precisely what stones you should be getting for your knives! Generally though, buy what you need as you need it. A buying order for example might be #1000, #220, #6000, #2000, #4000.
Many stones exist that are often #1000 on one side, and either #220 or #6000 on the other - those are great places to start. Read out whetstone care guide to know how to properly care for your stones as well so you can always sharpen properly.
Give your whetstones time to soak if they need it
Many whetstones on the market need to be fully hydrated by soaking in water before you start using them. If you don't soak them first or get them wet, no sharpening fluid will come out, plus the abrasive grains on the whetstone will clog - leading to a horrendous sharpening experience that won't actually sharpen your knife.
The best way to know if a stone needs soaking or not is to submerse it in water. If you see lots of bubbles coming out, keep it in there until bubbles stop coming out, which takes 5 to 10 minutes on average.
Some stones, like our Kirameki range don't need soaking and can simply have water splashed on them before you start. You do need to be careful with these as soaking these kinds of stones can actually damage them. In short, if you see bubbles keep it in there until there's no bubbles then take it out. If there's no or very few bubbles at the start, take it out immediately.
Knife Sharpening Method
The correct posture of knife sharpening
Having the right posture when sharpening is more important than you think! If you sharpen without knowing the correct postures and positions, it becomes much more difficult to do as well as less safe. If you're not careful, you could injure your fingers!
How to hold a knife
When sharpening the front (right side) of the knife, grip the handle with three fingers from the little to middle finger of your right hand. Place the your index finger on the spine of the blade and your thumb on the edge of the blade like the image above.
For your left hand, place your index and middle fingers on the blade like the image below and press the edge to touch the whetstone. When sharpening, press down the cutting edge towards the whetstone with slight force going forward and don't press the blade when coming back. Repeat this motion of going back and forth in a straight line to sharpen for a while and change the sharpening point of the blade as you go. Sharpen from the tip first and slide the blade to sharpen at the middle and then again for the base. Do this until the edge of the blade from tip to base is sharpened throughly.
When sharpening the opposite side of the knife (left side), switch the handle to your left hand and repeat the above.
How to move a knife while sharpening
Place the knife at a 45 degree angle to the whetstone like the image above.
This is not an absolute rule, merely a guide. If you find an angle that is comfortable for you to sharpen, that's fine too. Experiment and find what's comfortable for you.
What is more absolute is when moving the knife on the whetstone you must keep your wrist very firmly fixed. Use the flexibility of your elbows as you move the knife back and forth. Only apply pressure using your left fingers, reversed when sharpening the other side.
The best angle of knife sharpening
The most frequently asked question we get about sharpening is about the angle one should use when sharpening.
Single-edged Japanese-style knives have a cutting edge that runs from the base towards the tip, so there is a pre-existing angle you can rest the knife on the whetstone with, but double-edged Western-style knives don't have this and you have to decide the angle yourself.
Actually, this decision is a very difficult problem for many people new to sharpening. This flexibility allows for experimentation, but removes the more set flowchart that single-edged knives use. Broadly speaking, the sharpening angle to use changes depending on how damaged the knife is and how sharp the knife is perceived to be by the person using it. However, it is difficult for beginners to adjust or feel that out. Therefore, we recommend at least to start with to sharpen at an angle of about 10 to 15 degrees. The easiest way to measure this is to generally stack two coins on top of each other underneath the knife. That will get you to the right angle.
As you steadily get used to sharpening, experiment and try different angles to find the one that's most suitable for the way you sharpen and cut, as well as the sharpness and durability levels you're seeking.
How far should I sharpen?
Similar to the sharpening angle, a question that's often asked to us is precisely how "far" you should sharpen. After all, they don't want to undersharpen and not get the desired effect, or oversharpen and lose precious knife steel, removing lifespan from the knife.
In short, sharpen until the whetstone hits the edge of the blade. If the edge isn't sharp, it won't cut. Once you get the entire edge hitting the whetstone, you're good. This is why having a flat whetstone is important, as our whetstone care article explains. See an example below!
The best way to confirm that the blade has been sharpened to the edge is to check for burrs that will form as you sharpen.
As you continue sharpening, the edge of the blade on the opposite side will become rough. This is called kaeri, and is the metal that has been sharpened to the cutting edge turning over to the other side.
When this appears, the whetstone is hitting the edge of the blade. Make sure you get kaeri on the entire blade edge.
As you gradually improve your sharpening skills, you'll be able to visually check the condition of the cutting edge in addition to the burrs to see if it's being sharpened. You can also detect these burrs by lightly feeling with your fingers.
Our sharpeners also check whether the blade is being sharpened by checking the amount of light reflecting off the knife edge. If you can see a thin white line, there's a burr there, and if you see the white line on the entire cutting edge you've done your sharpening correctly.
How to sharpen the tip and base of the blade
The surface of the whetstone is flat - provided you've been resurfacing it or it's brand new.
On the other hand, most kitchen knives have a rounded or curved shape. If you sharpen them straight, they will end up changing to having a straight edge.
This results in the shape and base of the cutting edge collapsing, meaning your knife will lose its shape and thus cut very differently.
When sharpening the tip
When sharpening the tip, lift the handle slightly. Place your left fingers right near the tip, and sharpen with light force.
When sharpening the base
When sharpening the base of the blade, lower the handle downwards in the opposite direction to the tip. Apply a little pressure to your right thumb also.
About clamshell blades
As people improve their sharpening skills, they may start focusing on improving the sharpness levels they can achieve.
Therefore, they'll flatten the blade angle and sharpen the cutting edge to a very thin state. While it's true that sharpening the knife in this way will result in a sharper blade, a knife needs to be more than just sharp.
A very thin edge is very brittle and easily chipped, reducing a knife's lifespan due to higher risk of damage. Thinly sharpened blades, sometimes also called "flat-sharpened blades," also have many contact points with the food, making it very difficult for food to seperate from them.
Therefore, one technique for sharpening to fix these issues is called clamshell blade sharpening. You also see this in Japanese sometimes called hamaguriba.
A clamshell blade is a blade with a slightly curved edge, with a bulge similar to the way a clam shell might look. Sharpening via this method as apposed to just flat-sharpening retains the sharp thinness of the blade as well as adding some supporting thickness to the edge above it.
This leads to a sharpness that is also combined with durability, making your knife less likely to chip while also making food stick to it less when cutting through it.
This style of sharpening is an advanced technique, and not recommended for beginners. We still recommend knowing about it though and working to it as you progress through your sharpening journey.
About the secondary edge
The sharpening method we'll go into now is for advanced professionals. While they likely already know about this, again it's still useful for beginners to know as it helps them know where their progress will lead up.
The edge of a knife after sharpening is actually going to be thinner than is really necessary. As we said before, this makes the blade susceptible to chipping, even though it's sharp. There is a method which some people call small blade or thread blade pulling, but we refer to here as making a secondary edge.
How to make a secondary edge
When sharpening a secondary edge, be sure to use a finishing whetstone. If you sharpen the blade with a coarse or medium whetstone, you will sharpen it more than necessary, and the blade will become too thick. If you don't have this, use the highest grit number you have.
To create a secondary edge, simply hold the blade upright at a 45-degree angle and use light force to glide the edge forward over the whetstone. Be careful not to use too much force or sharpen too many times as this will make the edge of the blade thick. A few times is more than enough.
Also, be sure to keep your wrist steady and as always sharpen at a constant angle.
A faint white line can be seen on the edge of the blade after the blade has been pulled, which is the secondary edge.
This two-step edge approach makes the cutting edge strong, resulting in a blade that is both sharp and durable.
Once you get used to sharpening, you can make an expert edge and experience true sharpness!
It's time to sharpen!
With this, your preparation is done. Feel free to revise and go over techniques here and then read one of our many sharpening guides for your specific kind of knife! You can also reach out to us too if you have questions, or come into the store for a proper demonstration or lesson. We're always working on new guides too, plus our YouTube channel also has some demonstrations so be sure to give them a look.
We also have whetstones available for purchase online, as well as a larger natural range in store if you need supplies. It's all here to support your sharpening journey!