-
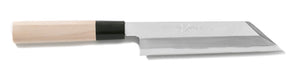
Japanese Knives
-
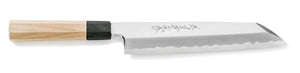
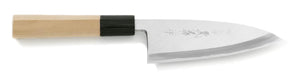
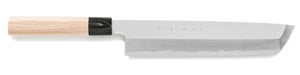
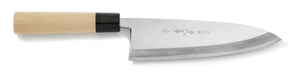 Deba Knives
 -
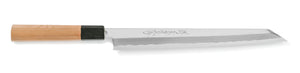
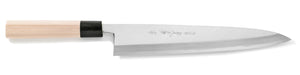
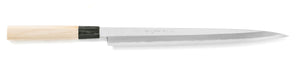
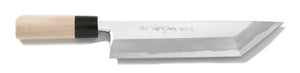
 Yanagiba Sashimi Knives
 -
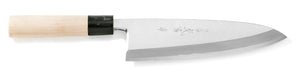
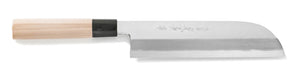 Usuba Knives
 -
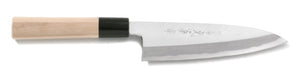
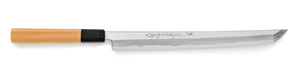
 Sakimaru Takobiki Knives
 -
 Kiritsuke Yanagiba Knives
 -
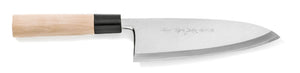
 Wa-Santoku Knives
 -
 Kiritsuke Knives
 -
 Mioroshi Knives
 -
 Aideba Knives
 -
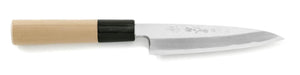
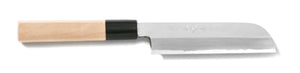
 Funayuki Knives
 -
 Fugubiki Knives
 -
 Takobiki Sashimi Knives
 -
 Aji-Kiri Knives
 -
 Baran-Kiri Knives
 -
 Hamo Honekiri Knives
 -
 Fugu Deba Knives
 -
 Unagi Saki Knives
 -
 Mukimono Knives
 -
 Kenmuki Knives
 -
 Sobakiri Knives
-
- Western Knives
- Damascus Knives
- Home Kitchen Knives
- Accessories
- Gifts
- All Products


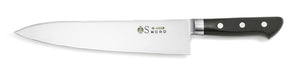
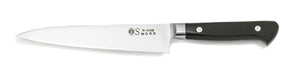
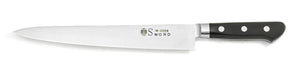


Beginner's Guide to Sharpening Gyuto Knives
While a gyuto knife is normally double-edged, this doesn't mean both sides are the same. These knives aren't necessarily sharpened symmetrically.
Infact, these knives are normally sharpened to a 70/30 ratio, with the right side curved tightly, whereas the left side is almost flat. When sharpening, you want to keep this ratio in mind to acquire a slightly single-edged cut. This guide will explain how to do just that while keeping that "clamshell blade" that Japanese knives are known for.
As a note, this is a beginner's guide. If you are more experienced, some steps here can be skipped at your own discretion.
For this sharpening, we are going to assume you have a rough, medium, and finishing whetstone. We sell these on our website if you need, and you can read our whetstone guide for recommendations. Our recommended whetstones change slightly depending on if your knife is a carbon steel or stainless steel knife.
We also strongly reading this entire guide through before starting, instead of just looking at it step-by-step. This will give you a full picture and help with your sharpening journey. There's also a video from one of our very experienced sharpeners with English subtitles on how to sharpen double-edged knives. It's right below this or it can also be accessed by clicking or tapping here. Be sure to set English subtitles in YouTube's settings. It's slightly different to this guide as it uses a santoku knife as an example, but well worth watching for some added perspective and to see how someone sharpens in motion!
Let's get to sharpening!
Video: A Beginner's Guide to Sharpening Double-Edged Knives from a PRO KNIFE SHARPENER!
English subtitles are available!!
Important points when sharpening a gyuto knife
Adjusting the blade's thickness
Western-style knives such as gyuto do not have a fixed cutting edge the way that Japanese-style knives do. You need to decide the sharpening edge and angle yourself, but this allows you to figure out a preference that suits you specifically. This cutting edge is not something that is locked in - it's okay to change it in the future if you want to try a different angle.
Sharpening the front and back sides of the blade
As gyuto are generally double-edged, you'll need to learn how to sharpen both sides properly. However, as you get more experienced we advise looking at both sides as seperate things to sharpen, and treating their thicknesses as seperate values. Do remember that it is a 70/30 ratio knife as well, so while it is double-edged it leans to one side slightly.
Be concious of the "clamshell edge"
Unlike single-edged Japanese-style knives which have a concave on the back edge, food will stick more easily to the blades of double-edged knives - this is why dimples like the Granton Edge exist on some of them. Be concious of the knife's shape when sharpening to make sure you're creating a blade form where food will continue to fall easily off the blade after cutting. It's important to sharpen your gyuto thoroughly, then focus on acquiring this "clamshell edge".
Step 1. Check the knife's condition
Before anything else, it's crucial to inspect the knife first. Feel free to write down anything you notice so you don't forget it, such as chips or other scratches. It can also be helpful to take images of both sides of the knife, as well as one from the choil to see how straight your knife currently is.
Knife sharpening isn't just about restoring the sharpness of a knife, but doing so while maintaining, restoring or keeping the correct shape. If you lose track of this, the knife's shape may change and as a result you may need to correct this, removing lifespan from your knife.
Make it a habit to check your blade, and do so constantly while sharpening. It's okay to take a few seconds and check!
A quick checklist is below, but feel free to add more steps to it like the ones suggested above.
- Check to make sure the cutting edge of the blade is not chipped or distorted
- Check the thickness of the cutting edge's front face
- Check the thickness of the cutting edge's back face
Step 2. Sharpen just the edge of the blade
Creating a "secondary edge"
We consider a blade "no longer sharp" when it has a curled or rounded edge. This will happen over time as your blade strikes cutting boards and other surfaces.
Firstly, we want to correct this. You'll need your medium whetstone here - we're using a #1000 whetstone, and advise you to do the same - preferably a medium-soft type #1000 if you're sharpening stainless steel.
Hold your blade up at a 45 degree angle like the image above and sharpen only the edge until you notice a burr appearing. This can be hard to see, so feel free to very carefully use your finger to trace the edge to feel for it.
As an extra note, if your knife has a chipped edge or has lost its form, this is the time we need to fix this - so sharpen until the knife has restored to its original shape.
The secondary edge or "two-step edge"
If you've sharpened the blade upright with the correct angle, a small "two-step edge" will form on the cutting part of the blade. You should be able to visibly see this depending on the lighting reflecting off the knife as a very thin white line. We also call this a secondary edge.
This small blade will be the tip of the cutting edge, so you'll continue sharpening using this point as a reference.
We initially create this secondary edge to make it easier to see where and what you're sharpening, as well as allowing you to easily inspect your process. We recommend doing this so that you don't accidentally make your blade too thin. You'll do this multiple times during this sharpening, so get used to looking for it.
Step 3. Sharpening with a rough whetstone
Sharpening until the secondary edge disappears
In this two-step edged shape, the cutting edge on the knife is thick - so the knife won't cut properly, even if you continue sharpening in this shape.
Therefore, lay the blade flat on a rough whetstone and sharpen firmly until the secondary edge disappears completely. This will require patience, but if it's not done correctly the blade's thickness won't change, so be thorough and take your time here.
The importance of the sharpening angle
When it comes to sharpening Western-style knives, the angle at which you sharpen is crucially linked to how the knife will perform.
If you make a low angle, the sharpening surface will be wide, the blade will be thin and sharp, but you'll also increase the chance of the blade chipping. Conversely, if you sharpening with high angle, the blade will be thick and less prone to chipping, but also suffer decreased sharpness.
For those not accustomed to sharpening yet (which is okay, we all started there), we recommend sharpening using an angle of 10 to 15 degrees (the width of about two coins stacked atop each other as shown above) as this will generally result in a sharpening width of about 3 millimeters. Over time as you sharpen your knife more often though, it's okay to experiment and find a sharpness that is most ideal for you and the way you use a knife.
At this stage of rough sharpening, it's crucial to make sure you've properly prepared the knife for further sharpenings. This is similar to making sure the primary bevel on a single-edge, traditional knife is done correctly early on.
If the sharpening is uneven this early in the process, it will lead to an uneven sharpening overall, ruining your hard work. So it pays to be extra careful here. Another way to look at this would be like looking at this step as building the foundations for a house. If they aren't good, the house won't be good. Same concept applies here.
Sharpening Tip #1
The trick to getting the entire blade to sharpen cleanly is to press the tip of the blade safely against the whetstone with your left fingers and twist your right wrist slightly forward while it grips the handle. If your left hand applies too much pressure, the edge of the blade could be oversharpened, and if you twist your right wrist too much, the whetstone won't make proper contact. This takes a lot of balance and practice. See the diagram below for an example!
Finish this step off with another inspection. Make sure the secondary edge on the right (front) side has disappeared. After confirming that, look at the other side and check to see if burrs are forming. Then it's time for the next step!
Step 4. Sharpening the left (back) side with a rough whetstone
Switch hands and sharpen the opposite face of the knife (should be the left side, also called the back side or back face) with the same rough whetstone (make sure the stone is flat before doing this, you may need to resurface).
Ideally, you want to lay the blade very flat here (more so than the front side) and sharpen like the image above until a burr appears on the opposite side like the below.
If you're intending to completely single-edge the blade here, make sure the back side is completely flat against the whetstone.
Also, be sure to hit the entire surface of this side when sharpening.
Step 5. Sharpening with a medium whetstone
It's at this step that we start getting more serious about putting a proper cutting edge onto your knife. Effectively, from here on out it's a style of polishing to just get that edge as sharp as possible.
Like you did with the rough whetstone sharpening, use your medium whetstone again to create a small secondary edge by sharpening with a higher angle. Please make sure to only use a little bit of force or you'll accidentally thicken the blade - which we don't want to do at this step. Gentle pressure is enough.
You may have noticed after the rough whetstone sharpening that the surface of the cutting edge is currently looking extremely rough, with some scratches on it. This is normal and expected behavior from sharpening with that stone. The idea behind this step is to polish and sharpen until those polishing scratches start to disappear using a medium whetstone. Again this can take some time, but do this patiently until you no longer see those scratches.
Be careful however, as the blade should now be very thin. This means it will burr very easily and creative excessive thinning. Don't sharpen all the way up to the cutting edge.
Establishing a sharp edge
Sharpen the knife at a slightly higher angle than when you did with the rough whetstone earlier. Do this until that secondary edge disappears.
You also want to raise the angle slightly to make sure that the whetstone is hitting the edge of the blade, creating a slightly curved, clam-shell like blade form. Make sure that a burr is visible and firmly sticking out on the other side.
Sharpening Tip #2
The trick to successfully getting the whetstone to properly make contact with the tip of the blade is to hold the edge with your left fingers while turning your right wrist, which is gripping the handle, inward as you sharpen. By doing this, the blade will raise very slightly, making the tip hit the whetstone easier. See the image below for an example.
Sharpen the back side
Switch to the other side once more and sharpen until burrs appear on the opposite side. Make sure you sharpen the back side using the same angle that you did when you sharpened it with the rough whetstone. Also, be careful of oversharpening here, as it can cause a curve to appear on this side as well, which we don't want.
Check to see if the secondary edge has disappeared
Visually check to make sure the secondary edge has disappeared from the cutting edge. If you find it left on the blade, sharpen that area by pressing your left fingers against it on the whetstone.
At this stage, if you don't see a secondary edge, then you've successfully made a knife that cuts! Well done! That said, we aren't done yet.
If you're just doing this for home use with a medium whetstone, or not looking for a very high level of sharpness you can skip the next step and move onto Step 7. But if you're pursuing higher levels of sharpness, read on!
Step 6. Sharpening with a finishing whetstone
In the same way you sharpened with the medium whetstone, use your finishing whetstone to create a new secondary edge, but only a small one. Be sure to check and make certain the edge has appeared before continuing further.
Remove sharpening scratches created from the medium whetstone
You may well be used to the procedure by now, but we'll go through it just to be safe. Polish the scratches made by the medium whetstone on the entire cutting edge using a finishing whetstone. Make sure to avoid sharpening the cutting edge itself as burrs will form. If you aren't sure what finishing whetstone to use, a #6000 is a great place to start.
Perform the final sharpening
Sharpen until you see the secondary edge disappear from your cutting edge.
That said, you do need to be more actively aware of how you're sharpening the edge of the blade using your finishing whetstone and make sure you're properly sharpening the cutting edge.
Sharpen the back side
Switch to the other side, and sharpen until you see burrs forming on the opposite side like in the medium whetstone step. Also, like before, sharpen using the same angle that you sharpened the backside with on the medium whetstone, and be careful of oversharpening.
We're almost done!
Step 7. Making a secondary edge
At this point you should have a rather sharp knife! This is great, however you're also going to have a very thin edge - meaning chips are more likely to occur. To avoid this, you can strengthen your cutting edge by making a secondary edge.
Raise the blade angle and make a secondary edge
Ideally, you want to use a finishing whetstone here, but if you don't have one of those, just use the finest whetstone you have and be careful not to press too heavily when making a secondary edge as you may thicken the blade, so please sharpen it with light force.
Hold the blade raised at around 45 degrees and lightly sharpen the cutting edge until a burr appears. Be sure to check the cutting edge also, and once again look for that reflective white line - meaning you have your final secondary edge!
Sharpening Tip #3
If your gyuto has a thick secondary edge, sharpness will decrease. So, you should make a secondary edge by passes as few as possible - preferably one or two. This will give you a great balance of sharpness and durability.
Once you see that burr coming out, switch to the other side and remove it.
Step 8. Perform some test cuts using newspaper
Before you go using the knife on anything else, we want to test it to make sure the cutting power you want to see has been achieved. Use a newspaper for this.
The test itself is quite simple - if the blade cuts through the newspaper smoothly, you've sharpened the blade correctly!
If you find the blade gets stuck at any point, it means that part of the blade isn't as sharp as the other sections, and you'll need to focus on fixing that point before testing again.
We're available also for any consultation. If you have questions about any of the steps here, your technique, the methods or meanings behind any of this or most importantly if you're finding your sharpening not working out - let us know. We're here to help, and we want to see your finished results as well! Contact us anytime.
Enjoy your sharpened gyuto knife! Remember, a sharp knife is a safe knife!